Standard Library Functions
Actions you will do every time you use SeTLS
Loaning items
Loaning a toy is the most basic function you will need to perform using this software. All loans are linked to a member's name.
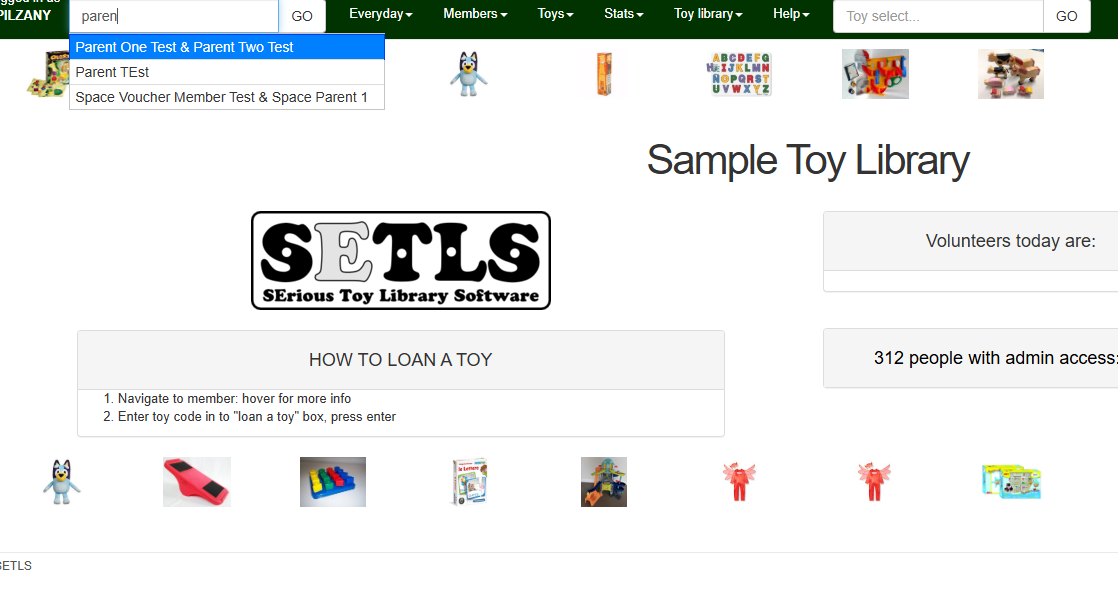
Begin typing the member's name in the search bar in the top left of your screen.
Click on the name to bring up the member's page.
Alternatively, pressing the ‘Go’ button, directs you to a page listing all members with ‘Paren’ in their name. Click on the name you
want.
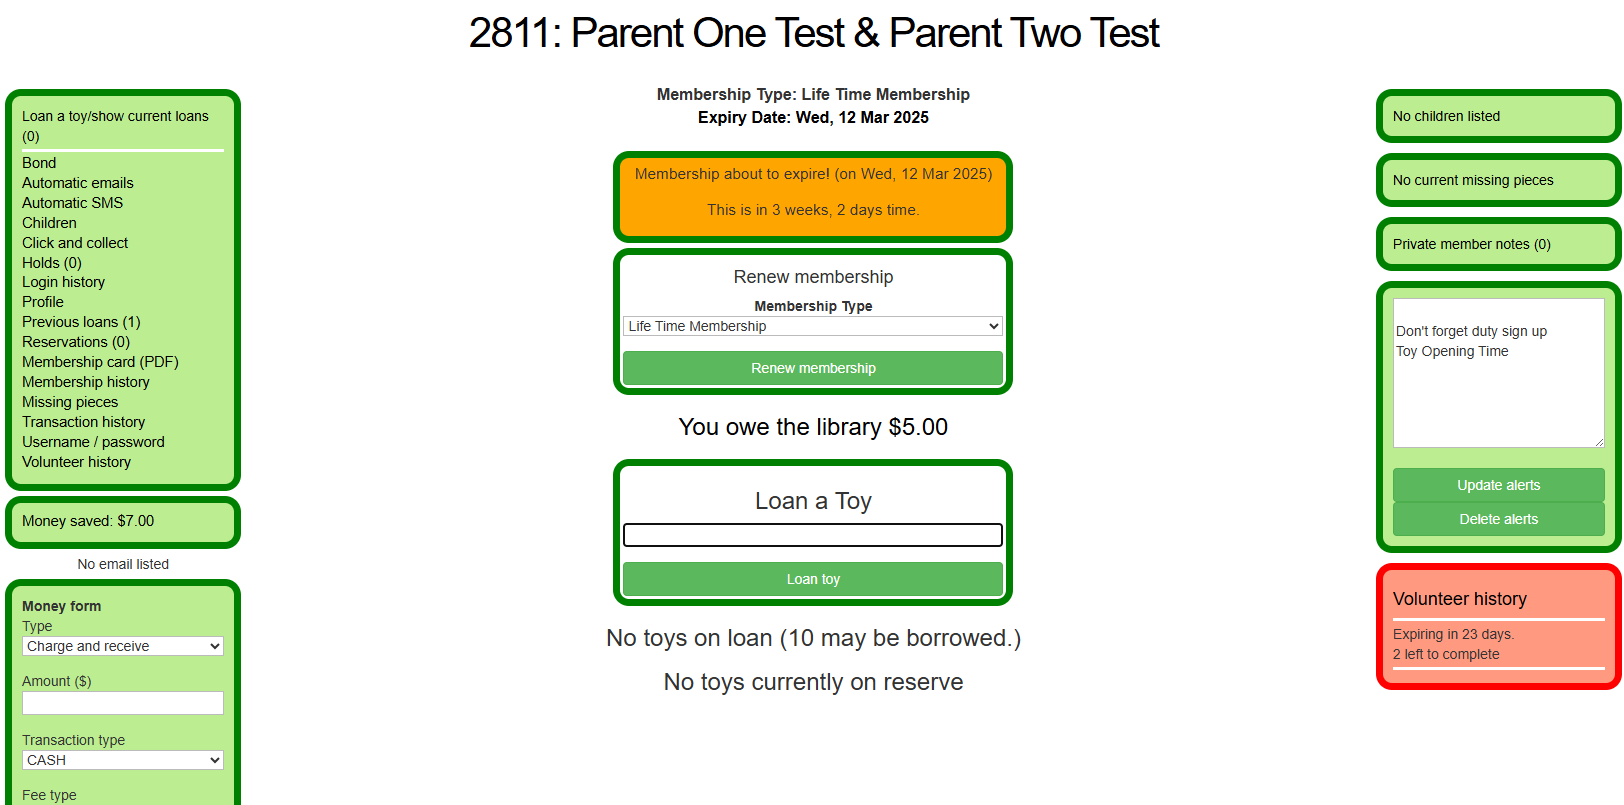
Your member pages look as shown below.
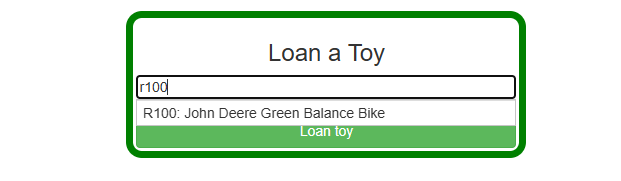
In the Loan a Toy box, start to type the unique code and number of the toy/item you are going to loan to the member. Choose the correct item and click on Loan toy.
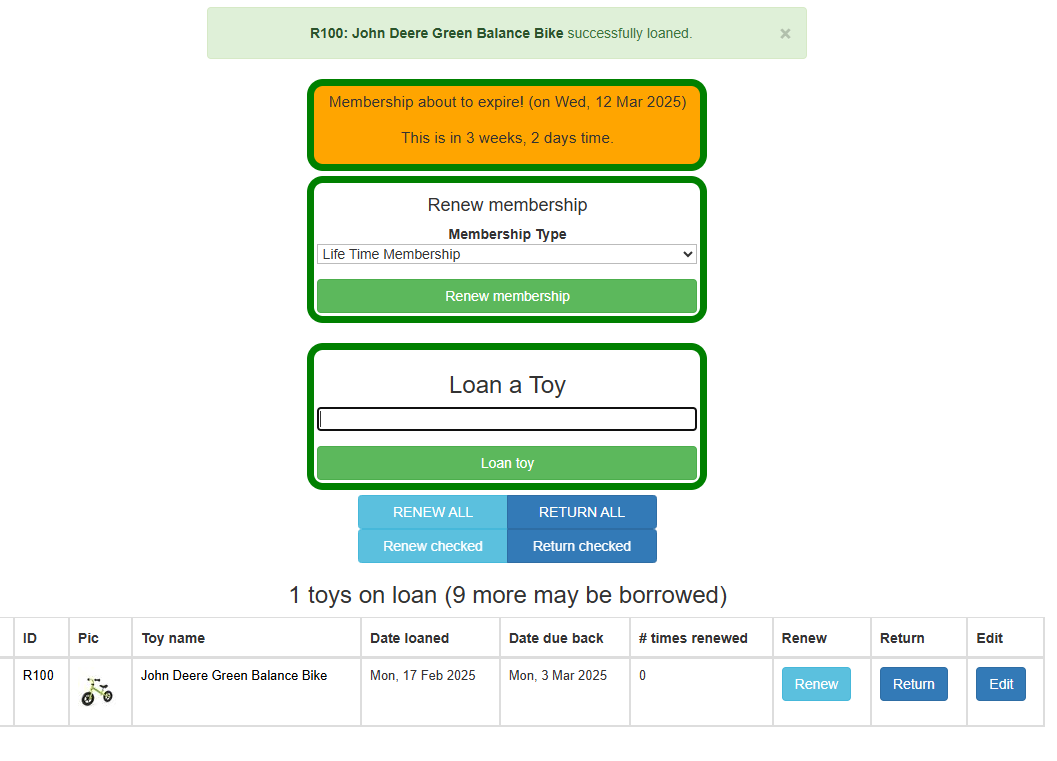
Check the toy loan has been successful (see green banner at the top of the screen), and confirm that the loan return date is correct (bottom of the screen).
*Note: A toy may not be available for loan because it has not been previously returned correctly within the toy library system. If this is the case you will get an error message on your screen stating that the toy is already ‘on loan’ as seen in the following:
 To resolve this issue click the ‘Override and loan anyway’ button and the toy will be correctly returned in the system and instantly loaned out to the member. You can then confirm the success of the loan as shown in the images above.
Navigate to a member's page
Locate the member you wish to navigate by typing in the navigation bar ‘Select member…’ field and pressing ‘GO’.
The following image shows the landing page for the member named ‘Parent One Test and Parent Two Test’.
The middle part of the page is where you can loan a toy. This section of the page will also display any of the current loans the member has, including details about due dates and fines.
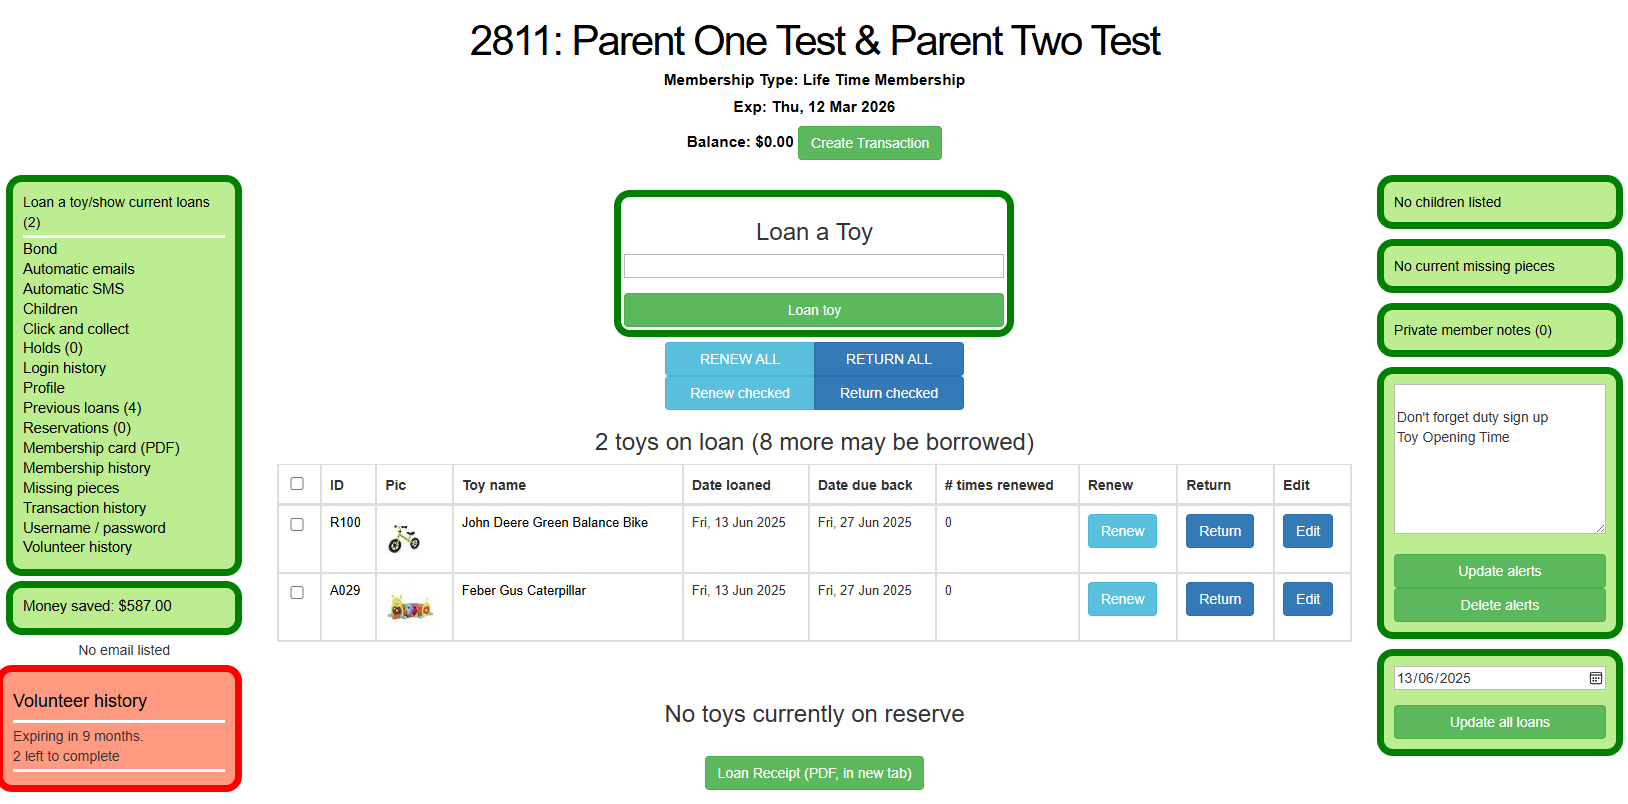
The text immediately below the member name shows Membership Type and the expiry date (expired membership will be in red font).
It also shows the balance owing on the account, and allows you to create a transaction (payment) accordingly.
The panel on the top left side of the page in the image above contains clickable links to further information on this member: Bond, Automatic Emails, Children, Click and Collect, Holds, Login history, Profile, Previous loans, Reservations, Membership history, Missing pieces, Transaction history, Username/Password and Volunteer history.
The square panel on the right side of the screen is to create alerts for a member.
The panel on the lower left side of the screen contains a summary of this member’s volunteer history as well as a link to set up volunteer dates.